
HDI PCB impedance control is the process of designing, fabricating, and verifying controlled transmission lines so that high-speed signals maintain a stable target impedance across an HDI PCB. In high density interconnect designs, impedance is mainly affected by trace width, trace spacing, copper thickness, dielectric thickness, dielectric constant, reference plane continuity, via structure, and actual manufacturing tolerance. For engineers, the core answer is simple: impedance control must be confirmed before routing, checked again during CAM engineering, verified with impedance coupons, and measured by TDR after HDI PCB fabrication.
HDI PCB Impedance Control
HDI PCB impedance control is required when signal edges are fast enough for PCB traces to behave as transmission lines. Typical controlled impedance values include 50 ohm single-ended, 90 ohm differential, and 100 ohm differential.
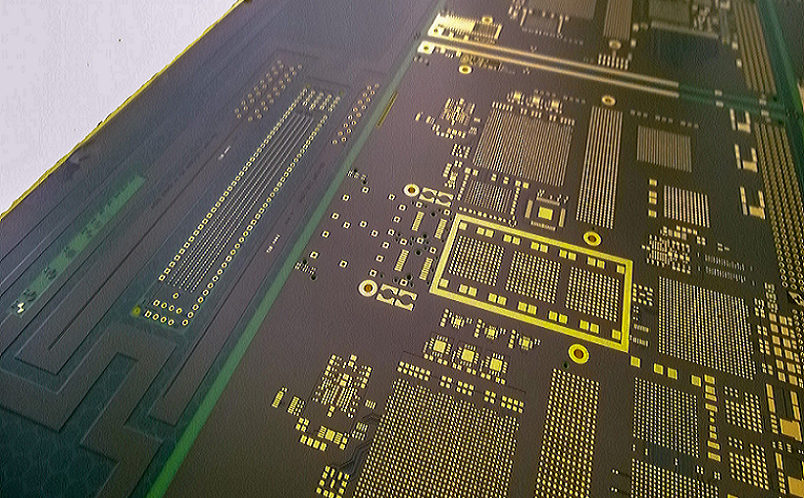
In HDI circuit boards, impedance control becomes more difficult because the layout often includes fine-pitch BGA escape routing, laser microvias, buried vias, stacked vias, staggered vias, and via-in-pad plated over structures. A 0.4 mm or 0.5 mm BGA may require 2.5 mil to 3.0 mil traces, while the main impedance route may need 3.8 mil to 5.0 mil traces to reach the required impedance.
Common HDI PCB impedance targets include:
- 50 ohm single-ended traces for clocks, RF control, and high-speed single-ended nets
- 90 ohm differential pairs for USB, MIPI, and LVDS interfaces
- 100 ohm differential pairs for PCIe, Ethernet, HDMI, and SerDes channels
- Plus or minus 10 percent tolerance for standard controlled impedance
- Plus or minus 7 percent tolerance for tighter high-speed HDI circuit boards
- Plus or minus 5 percent tolerance only after stackup, material, and process capability are confirmed
IPC-2221 is commonly used for general printed board design requirements, while IPC-6012 is used for rigid printed board qualification and performance requirements. In production, these standards must be supported by real stackup control, coupon design, TDR testing, microsection inspection, and final electrical testing.
Factors for HDI Impedance Control
Factors for HDI impedance control are not limited to trace width. A trace that is mathematically correct in design software can still fail if lamination thickness, copper plating, or etching compensation changes during production.
Key production factors include:
- Finished trace width after etching
- Finished copper thickness after plating
- Dielectric height between trace and reference plane
- Dk value at the working frequency
- Df value for insertion loss control
- Glass weave effect in high-speed channels
- Solder mask thickness over outer-layer impedance traces
- Differential pair spacing and symmetry
- Plane voids, split planes, and anti-pad clearance
- Via stub length and back drilling requirement
- Sequential lamination registration tolerance
For a high density interconnect project, the most common failure is not a wrong impedance formula. The common failure is that the designed geometry is outside the stable production window. A 2.5 mil trace with 0.5 oz copper may be achievable, but the same 2.5 mil trace with heavier copper and dense copper distribution may create etching variation that shifts impedance by 4 ohm to 8 ohm.
Trace Dimensions
Trace Dimensions are the first physical control point for HDI PCB impedance. On thin dielectric HDI layers, even a 0.3 mil to 0.5 mil finished trace width variation can move impedance outside the required tolerance.
Typical production ranges include:
- Standard HDI routing: 3 mil trace and 3 mil spacing
- Advanced HDI routing: 2.5 mil trace and 2.5 mil spacing
- High-end HDI routing: 2 mil trace and 2 mil spacing after engineering review
- Laser microvia diameter: 0.075 mm to 0.125 mm
- Microvia pad diameter: 0.20 mm to 0.30 mm
- Common BGA pitch: 0.4 mm, 0.5 mm, 0.65 mm, and 0.8 mm
- Outer-layer finished copper: 0.5 oz to 1 oz
- Inner-layer copper: 0.5 oz or 1 oz
- Typical etching compensation: 0.3 mil to 0.8 mil depending on copper thickness
From the HDI PCB manufacturer side, the finished trace is more important than the CAD trace. If the drawing specifies 3.5 mil for a 100 ohm differential pair, CAM engineering must calculate whether the final etched width will remain inside tolerance after plating, etching, and surface finish.
Layer Stack-up
Layer Stack-up determines whether impedance can be produced repeatedly. In HDI PCB fabrication, the stackup controls the dielectric distance, copper thickness, reference plane location, lamination sequence, and microvia structure.
A practical 10-layer HDI PCB stackup may use:
- L1: signal
- L2: ground
- L3: signal
- L4: power
- L5: signal
- L6: signal
- L7: power
- L8: signal
- L9: ground
- L10: signal
Typical dielectric ranges include:
- Laser dielectric: 50 micrometer to 75 micrometer
- Fine-line impedance dielectric: 75 micrometer to 100 micrometer
- Standard internal dielectric: 100 micrometer to 150 micrometer
- Finished board thickness: 0.8 mm to 2.4 mm
- Sequential lamination registration tolerance: plus or minus 50 micrometer to 75 micrometer
A thinner dielectric allows narrower traces for the same impedance, which helps BGA escape routing. The tradeoff is that thin dielectric increases manufacturing sensitivity. A 10 micrometer dielectric shift can change impedance enough to affect tight plus or minus 5 percent targets.
Material Properties
Material Properties directly affect impedance, loss, and long-term signal stability. The key values are dielectric constant, dissipation factor, glass style, resin content, copper roughness, and thickness tolerance.
Typical material ranges include:
- Standard FR-4 Dk: 4.0 to 4.5
- Mid-loss material Dk: 3.6 to 4.0
- Low-loss material Dk: 3.2 to 3.8
- Standard FR-4 Df: 0.015 to 0.020
- Low-loss material Df: 0.003 to 0.010
- High-Tg material: 170 degrees Celsius to 200 degrees Celsius
- Common finished copper roughness impact: more visible above 10 Gbps
For 1 Gbps to 5 Gbps digital signals, standard high-Tg FR-4 may be acceptable if the route is short and the loss budget is not tight. For 25 Gbps, 56 Gbps, or 112 Gbps channels, low-loss material, smoother copper, glass weave selection, and tighter stackup control become part of the electrical design.
Return Paths
Return Paths control the electromagnetic field around the signal trace. A trace only has stable impedance when the return current can flow through a continuous nearby reference plane.
Production rules include:
- Route high-speed signals next to solid ground planes
- Avoid crossing split planes or large plane openings
- Keep stitching vias within 1 mm to 2 mm of signal layer transitions
- Keep differential via structures symmetrical
- Add ground vias near high-speed signal vias
- Avoid reference voids under BGA escape channels
- Keep anti-pad clearance consistent around impedance vias
A common production issue occurs when the impedance coupon passes but the real board fails signal testing. The reason is often a discontinuous return path under the real routed trace. The coupon measures a clean structure, while the real channel crosses a plane split, connector void, or power island.
Design Tools & Modeling
Design Tools & Modeling must be used before routing is frozen. A simple impedance calculator can estimate early width and spacing, but HDI PCB impedance control usually requires a field-solver-based stackup check.
The engineering data package should include:
- Layer-by-layer stackup
- Material type and Tg
- Dk and Df values
- Copper thickness before and after plating
- Dielectric thickness after lamination
- Target impedance values
- Trace width and differential spacing
- Reference plane layer
- Tolerance requirement
- Coupon requirement
- Critical net list
For HDI circuit boards, the stackup should be approved before final routing. If the dielectric thickness changes after layout, the controlled impedance trace widths may no longer be valid.
Field Solvers
Field Solvers calculate impedance by modeling the electromagnetic field around the trace. This is more accurate than simplified equations when the design includes thin dielectric, coated microstrip, asymmetric stripline, differential pairs, solder mask, or high-speed via transitions.
Field solver inputs should include:
- Finished trace width
- Finished trace spacing
- Finished copper thickness
- Dielectric thickness after pressing
- Dk at the operating frequency
- Solder mask thickness for outer layers
- Copper roughness for high-speed loss analysis
- Plane distance and reference layer structure
- Differential pair geometry
Factory engineering must convert the field solver result into a producible trace width. If the solver calculates 3.15 mil but the stable etching window starts at 3.5 mil, the stackup should be adjusted instead of forcing an unstable trace width into production.
Manufacturing Limits
Manufacturing Limits decide whether an HDI PCB prototype can become repeatable production. A design may pass simulation but still fail in fabrication if it exceeds the process window.
Typical HDI PCB fabrication limits include:
- Stable trace and spacing: 3/3 mil
- Advanced trace and spacing: 2.5/2.5 mil
- Special process trace and spacing: 2/2 mil
- Laser microvia diameter: 0.075 mm minimum for advanced HDI
- Standard laser via aspect ratio: 0.75:1 to 1:1
- Mechanical drilling aspect ratio: 8:1 to 12:1 for stable production
- Advanced mechanical drilling aspect ratio: 14:1 to 18:1 after review
- Controlled impedance standard tolerance: plus or minus 10 percent
- Advanced impedance tolerance: plus or minus 7 percent
- Special impedance tolerance: plus or minus 5 percent
If a project combines 2/2 mil routing, 0.075 mm stacked microvias, 3-step HDI, low-loss material, and plus or minus 5 percent impedance, it should be treated as a high-risk build during quotation and CAM review.
Engineering Resources
Engineering Resources reduce errors before fabrication. A complete HDI PCB manufacturer package allows the factory to check manufacturability, impedance, and inspection requirements without guessing.
A complete package includes:
- ODB++ or Gerber data
- IPC-356 netlist
- Fabrication drawing
- Stackup drawing
- Controlled impedance table
- Material requirement
- Finished copper thickness
- Drill chart
- Microvia structure
- Via filling requirement
- Surface finish requirement
- Critical trace list
- Impedance coupon requirement
- Electrical test requirement
A drawing that only says “controlled impedance required” is incomplete. The drawing must define target impedance, layer, trace width, spacing, tolerance, reference plane, and coupon requirement.
Design Strategies
Design Strategies must balance electrical performance, density, yield, and cost. The best HDI PCB is not the one with the smallest trace width. The best HDI PCB is the one that meets impedance targets inside a stable production window.
Practical design strategies include:
- Lock the stackup before final routing
- Use ground as the main high-speed reference plane
- Keep 50 ohm traces between 3.5 mil and 6.0 mil where possible
- Keep 100 ohm differential traces between 3.5 mil and 5.0 mil where possible
- Use 2.5 mil to 3.0 mil neck-down only in BGA escape zones
- Keep neck-down length below 3 mm to 5 mm when possible
- Return to nominal impedance width after BGA breakout
- Avoid unnecessary plus or minus 5 percent impedance
- Use via-in-pad plated over only when routing density requires it
- Keep high-speed via transitions short and symmetrical
Identify Critical Traces
Identify Critical Traces before layout begins. Not every net requires controlled impedance, and unnecessary impedance control increases cost, inspection time, and engineering risk.
Critical traces usually include:
- PCIe differential pairs
- USB 3.x differential pairs
- HDMI differential pairs
- MIPI D-PHY and C-PHY routes
- Ethernet differential pairs
- LVDS channels
- DDR clock, address, command, and data groups
- FPGA transceiver lanes
- RF feed lines
- High-speed ADC and DAC interfaces
- Clock routes above several hundred MHz
Low-speed GPIO, reset, enable, low-frequency I2C, and slow SPI lines normally do not need impedance coupons. This separation keeps the HDI PCB prototype focused on real signal integrity risks.
Define Trace Geometry
Define Trace Geometry in the fabrication drawing. The impedance requirement must be tied to layer, target value, width, spacing, and reference plane.
| Signal Type | Layer | Target | Width | Spacing | Reference |
|---|---|---|---|---|---|
| Single-ended | L1 | 50 ohm | 4.2 mil | N/A | L2 GND |
| Differential | L3 | 100 ohm | 3.8 mil | 6.0 mil | L2 GND |
| Differential | L8 | 90 ohm | 4.0 mil | 5.5 mil | L9 GND |
| RF line | L1 | 50 ohm | 5.0 mil | N/A | L2 GND |
This format helps CAM engineers verify controlled impedance without changing the designer’s intent. It also prevents the factory from applying one trace width to all layers.
Continuous Reference Planes
Continuous Reference Planes are required for stable impedance and low EMI. A controlled trace over a broken reference plane is not truly controlled.
Factory review should check:
- No split plane under high-speed traces
- No large anti-pad field under differential pairs
- No plane slot under clock lines
- Ground stitching vias near every signal layer transition
- Symmetrical via placement for differential pairs
- Clear return path through connector breakout areas
- Stable reference plane under BGA escape routes
A continuous ground reference improves impedance stability, lowers common-mode noise, and reduces signal reflection.
Manage Trace Widths
Manage Trace Widths carefully in dense HDI routing. Fine-pitch BGA areas often require temporary neck-down traces, but long neck-down sections create impedance discontinuity.
Production-safe rules include:
- Use 2.5 mil to 3.0 mil neck-down only where needed
- Keep neck-down below 3 mm to 5 mm
- Return to calculated impedance width after BGA escape
- Keep differential pair neck-down symmetrical
- Avoid repeated width changes on the same channel
- Avoid mixing 2 mil and 5 mil sections without modeling
- Confirm whether neck-down areas are included in impedance acceptance
For a 0.4 mm BGA, 2.5 mil traces may be required for escape. The main route may need 4.0 mil to 4.5 mil for 50 ohm. The transition area should be short and controlled.
Working with Your HDI PCB Manufacturer
Working with Your HDI PCB Manufacturer should start before layout is completed. The factory has actual data for laminate availability, press thickness, copper thickness, drilling limits, plating capability, and impedance coupon rules.
The engineering review should confirm:
- Material brand-independent electrical grade
- Dk and Df value used for calculation
- Actual dielectric thickness after lamination
- Finished copper thickness
- Trace compensation value
- Minimum line and space capability
- Laser microvia size and pad size
- Sequential lamination structure
- Via filling and planarization process
- Coupon location on the production panel
- TDR test acceptance criteria
Early review can prevent a complete layout change after CAM analysis.
Specify Your Stackup
Specify Your Stackup clearly because controlled stackup and controlled impedance are not the same requirement.
| Item | Controlled Stackup | Controlled Impedance |
|---|---|---|
| Control target | Layer thickness and material | Electrical impedance value |
| Main data | Copper, dielectric, resin, core | Ohms, tolerance, coupon |
| Verification | Construction and thickness check | TDR measurement |
| Main risk | Wrong build structure | Signal reflection |
| Best use | Mechanical and process stability | Signal integrity |
In high density interconnect boards, both requirements are often needed. The controlled stackup defines the physical construction, while controlled impedance verifies the electrical result.
Confirm Manufacturing Tolerances
Confirm Manufacturing Tolerances before production release. Tight tolerance should match real signal requirements and factory capability.
Practical tolerance values include:
- Plus or minus 10 percent for standard controlled impedance
- Plus or minus 7 percent for advanced HDI PCB impedance control
- Plus or minus 5 percent for special high-speed channels only
- Plus or minus 10 percent for general board thickness
- Plus or minus 0.5 mil trace width tolerance for fine-line production
- Plus or minus 10 percent dielectric thickness variation after lamination
Quality control should include:
- CAM impedance calculation before production
- Stackup verification before lamination
- AOI inspection for trace width and spacing
- Copper thickness inspection
- Microsection for plating and microvia quality
- Impedance coupon testing by TDR
- Final electrical test by netlist
- Impedance report with measured values
- COC when required by the purchase order
A reliable HDI PCB manufacturer should provide measured coupon data, not only a statement that the board is impedance controlled.
Determine if the Option is Necessary
Determine if the Option is Necessary before adding advanced HDI features. Each option affects cost, yield, and lead time.
| Option | Use When Necessary | Avoid When |
|---|---|---|
| Via-in-pad plated over | 0.5 mm or 0.4 mm BGA requires it | Dogbone fanout can meet routing |
| 2/2 mil routing | Escape density cannot use 3/3 mil | 3/3 mil meets impedance and spacing |
| Plus or minus 5 percent impedance | SerDes margin is very tight | Plus or minus 10 percent is acceptable |
| Low-loss laminate | Data rate is above several Gbps | Standard FR-4 meets loss budget |
| Back drilling | Mechanical via stubs create reflection | Blind vias already remove stubs |
| 3-step HDI | Routing density requires stacked layers | 1-step or 2-step HDI is enough |
The correct high density interconnect design uses the minimum advanced structure needed to meet electrical and mechanical requirements.
Two Key Comparisons
| Design Choice | Lower-Risk Option | Higher-Risk Option | Factory Impact |
|---|---|---|---|
| Impedance tolerance | Plus or minus 10 percent | Plus or minus 5 percent | Tighter tolerance increases coupon rejection and CAM adjustment |
| HDI routing | 3/3 mil with 0.10 mm microvia | 2/2 mil with 0.075 mm microvia | Smaller geometry increases etching, drilling, and registration risk |
These comparisons help engineers decide whether the extra process complexity is justified.
Real Factory Case
A 12-layer 2-step HDI PCB prototype was built for a high-speed FPGA module. The board used 0.5 mm BGA, 100 ohm differential pairs, 50 ohm clocks, and via-in-pad plated over pads.
Original build data:
- Layer count: 12 layers
- HDI structure: 2-step sequential lamination
- Board thickness: 1.6 mm
- Material: high-Tg 180 degrees Celsius class
- Minimum trace and spacing: 3/3 mil
- Laser microvia: 0.10 mm
- Microvia pad: 0.25 mm
- BGA pitch: 0.5 mm
- Differential target: 100 ohm plus or minus 10 percent
- Single-ended target: 50 ohm plus or minus 10 percent
- Surface finish: ENIG
- Finished copper: 1 oz outer layers, 0.5 oz inner layers
CAM review found five issues:
- L3 differential pair width was 3.0 mil, but the calculated impedance was 92 ohm
- L3 dielectric was 75 micrometer, too thin for the selected geometry
- Several SerDes pairs crossed a plane opening near a power island
- Microvia anti-pad clearance was below the stable registration window
- The fabrication note requested plus or minus 5 percent, but the layout only supported plus or minus 10 percent
Engineering changes before production:
- L3 dielectric increased from 75 micrometer to 90 micrometer
- Differential pair width changed from 3.0 mil to 3.5 mil
- Differential spacing changed from 4.0 mil to 5.5 mil
- Ground reference plane was restored under all SerDes pairs
- Stitching vias were added within 1.5 mm of layer transition points
- Anti-pad clearance increased by 50 micrometer
- Impedance tolerance changed from plus or minus 5 percent to plus or minus 7 percent
- Coupon design was matched to the actual production layers
First article results:
- 100 ohm differential coupons measured from 96.8 ohm to 103.5 ohm
- 50 ohm single-ended coupons measured from 48.7 ohm to 51.9 ohm
- Microsection confirmed continuous copper plating in laser vias
- AOI confirmed no trace neck-down over-etch issue
- Electrical test passed by netlist
- Assembly validation passed without layout redesign
The case shows that impedance control is not only a layout calculation. It is a combined stackup, material, CAM, lamination, etching, and test process.
Common Design Errors from Production
Common errors seen in HDI PCB fabrication include:
- Missing stackup data
The drawing lists impedance but does not define dielectric thickness, copper thickness, or reference planes. - Same width on all layers
L1 microstrip, L3 stripline, and L8 stripline need different trace widths for the same impedance. - Over-tight tolerance
Plus or minus 5 percent is requested for signals that can accept plus or minus 10 percent. - Long neck-down routing
A 2.5 mil escape trace continues for 30 mm instead of returning to the calculated impedance width. - Split plane crossing
The coupon passes TDR, but the real trace fails because the return path is broken. - Solder mask ignored
Outer-layer coated microstrip impedance is calculated as bare copper, causing measurement mismatch. - Material changed after routing
A different Dk or dielectric thickness invalidates the original impedance width. - VIPPO used without need
Via-in-pad plated over is added where dogbone fanout could meet routing, increasing cost and risk.
FAQ
Question: What is HDI PCB impedance control?
Answer: HDI PCB impedance control is the design and manufacturing process used to keep high-speed traces at defined impedance values, such as 50 ohm single-ended, 90 ohm differential, or 100 ohm differential. It requires controlled trace geometry, dielectric thickness, material Dk, reference planes, coupon design, and TDR verification.
Question: What tolerance is realistic for HDI circuit boards?
Answer: Plus or minus 10 percent is realistic for standard controlled impedance. Plus or minus 7 percent is common for advanced HDI circuit boards. Plus or minus 5 percent should only be used when the HDI PCB manufacturer confirms that the stackup, copper thickness, etching process, and coupon design can support it.
Question: Does every HDI PCB prototype need via-in-pad plated over?
Answer: No. Via-in-pad plated over is normally used for 0.5 mm or 0.4 mm BGA escape routing when dogbone fanout cannot meet density or impedance requirements. If 3/3 mil routing and standard microvias can complete the breakout, VIPPO may add cost without adding value.
Question: How does an HDI PCB manufacturer verify impedance?
Answer: The manufacturer verifies impedance by reviewing the stackup, calculating trace geometry, building impedance coupons on the production panel, and measuring those coupons with TDR equipment. Quality control also includes AOI, copper thickness inspection, microsection, final electrical test, and an impedance report.


![Understanding PCB Costs & Pricing [Your Complete Guide]](https://hdicircuitboard.com/wp-content/uploads/elementor/thumbs/Understanding-PCB-Costs-Pricing-Your-Complete-Guide-qzzhe6mcaxuolkux3xalfktgavumi9y1aqfbs9bpv4.webp "Understanding PCB Costs & Pricing [Your Complete Guide]")


